Took awhile to write new post :) I have did this multiplexing and it works. I'll just put photo and schematics here, everything about multiplexing you can read in previous post.
And a hex compiled program (for simulation purpose I set low flickering frequency, the real one have higher), which scrolls through alphabet and digits on leds.
Next todo is scrolling through words and phrases and maybe some info on font drawings. Stay tuned.
Tuesday, September 29, 2009
Tuesday, September 1, 2009
Multiplexing
Now I plan to connect another alpha-numeric segment led. But I have only one output pin for multiplexing. Do you know what is multiplexing? Well, when we need to use many segment indicators on one micro-controller with not that much pins, we have to use multiplexing. Here how it works: we turn on first indicator and show segments, then after 0.1 seconds we turn off first - and turn on second indicator and show segments again and so on and so on. Our eyes can't see any flickering but we can see all indicators and segments like if they turned on at the same time. Maybe my explanation too bad, you can always google it :)
In many articles about segment leds multiplexing I saw authors used one pin for one indicator. So if I have 2 indicators I should use 2 pins, but it's wasting of pins! I have only 1 pin for showing one of two indicators at a time. And know what? I have made a little schematics which can let me do it! I have used a NOT logic gate made of transistors.
Schematics:
How it works: When switch (SW1) at lower position Q1 (PNP) turns on and let current flow to SL1 and SL1 lights up. When switch at higher position Q2 (NPN) turns on and work as NOT gate for Q3 (PNP) which gets low signal and turns on, as Q1 when switch at lower position, and SL2 lights up. For my project I will put segment leds indicators in place of leds on picture and instead of switch I will connect wire to a pin on micro-controller.
That's all for today. Next I will write a program to control multiplexing and show digits and letters on alpha-numeric segment led indicators. Stay tuned.
Friday, August 14, 2009
First try
I have received a couple of AVR micros from SparkFun in nice red box :) And I've got alpha-numeric segment led indicators from ebay. So I have breadboard, segment led, ATMEGA328P micro, let's do something.
I have Ubuntu on my pc and setting up dev environment was pretty easy. Oh I forgot to say about avr programmer. I've got it from SparkFun too, it's a Pocket AVR Programmer (usbtiny clone). Sadly it works while connected through usb hub only.
Take a breadboard, put segment led and avr there, connect free ports to led, connect programmer and it's done. I have made a little program which makes a light run on segments, it's pretty easy, and I've got it working pretty fast, which prooves that AVR micros is pretty easy for noobs :)
Ok, here is a schematics I made in Proteus, which can emulate AVRs.
As you can see, segment led is a common anode.
And here is a source code of running light for this schematics.
As a result of what I've done on my little breadboard.
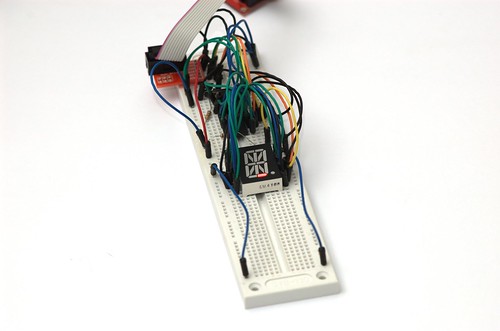
I'm planning to connect another segment led with multiplexing, because I have not another 16 ports for another leds. Stay tuned.
Sunday, July 19, 2009
Intro
Here is a little intro on what this blog will be about.
I have some projects in my mind to do. Projects for which micro-controllers are the best.
I'm not a novice in programming, but I'm totally n00b in micro-controllers. I have did a little research and found that coding for AVR (Atmel) micros is easier than for Pic (Microchip). And programmers for AVR are a bit cheaper. Second, I can use only usb programmers, because I have not any COM/LPT ports on my computers, and usb is more friendly. Third, I'm using Linux (Ubuntu), so I need development tools able to run under my os. That's all, I selected AVR and ARM in deep future :)
I will post here my findings, fails, code, etc, all about novice would come into.
Subscribe to:
Posts (Atom)